|
One of the great things about homebrewing beer is the incredible range of yeast available to us. However, it can be expensive to buy each time ($4-10+ per 5 gal batch), and many methods for storing it can be difficult and time consuming. Yeast slanting is an easy way to build up a large yeast bank for long time storage. It doesn't require much equipment, and has very little maintenance compared to other yeast banking methods. In this post, I will explain how I've been doing it. 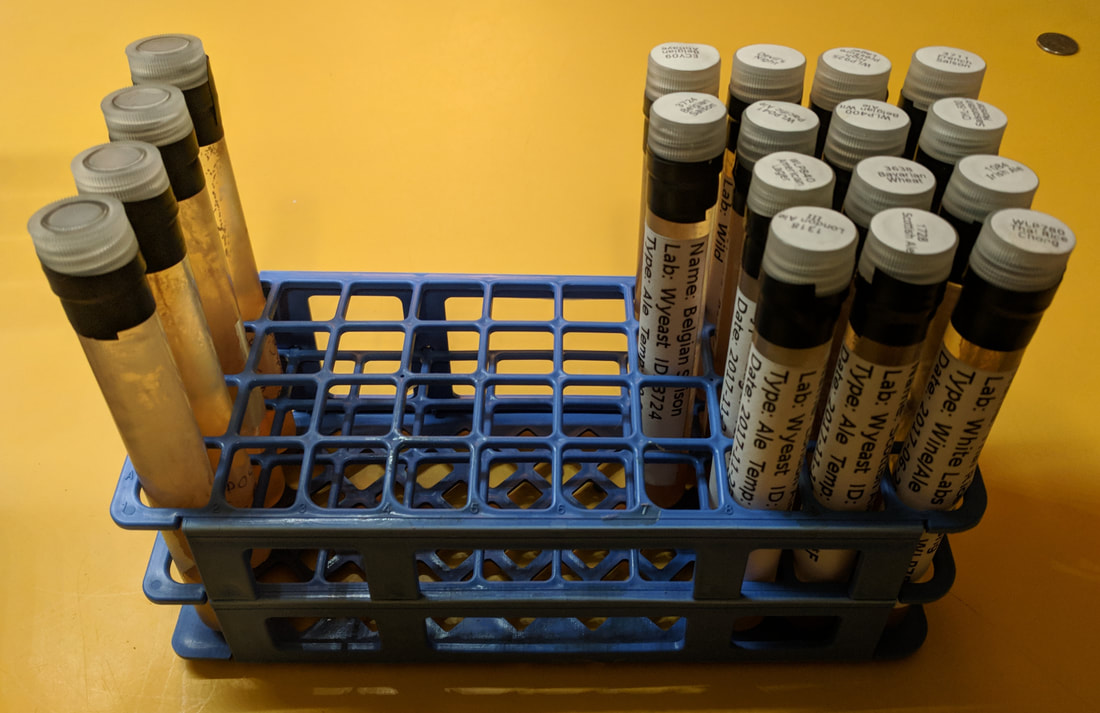 Prepared Yeast Slants Slanting yeast consists of creating test tubes filled with solid growth medium called slants, which you can use to easily store your yeast for homebrewing beer. The benefits of it over other methods of yeast ranching are:
The downsides to it are:
We create the slants with a low SG starter wort, and agar agar powder (No, you haven't had one too many homebrews and are seeing double and it's not a typo. It's called agar agar.). The wort provides food for the yeast, while the agar agar solidifies the wort, providing us with a place to grow it. Agar agar is used instead of gelatin, since it sets more firmly than gelatin, has a higher melting point and is harder to digest for bacteria. The name slant comes from the way you allow the test tube to solidify on a slant, which gives you much more surface area to innoculate with yeast. Once made, blank slants can be kept indefinitely at room temperature. To innoculate the slant with our yeast, all we have to do is swipe our yeast with an innoculation loop, and streak it across our slant. We let that sit for a few days to grow, then fill the tube up with mineral oil, which acts as a protective barrier for the yeast. Innoculated slants must be kept refrigerated, but can keep for 2+ years before they may need to be reslanted, and you can use it for multiple brews in that time, as you only need a single tiny colony of yeast to propogate. When we want to use a banked yeast strain, we just take our innoculation loop, swipe some yeast out of our slant, then put it in one of our premade mini-starters. From there, we just grow it in stages with increasingly larger starters until we get a pitchable amount of yeast. Still interested? Let's get to it! * Note - I am not a professional microbiologist, just a homebrewer interested in yeast. Although I have done quite a bit of research on this, and this method works great for me I am not implying that it is the only or even best method of doing it. If you have any tips, or notice any inaccuracies, please let me know! Materials Needed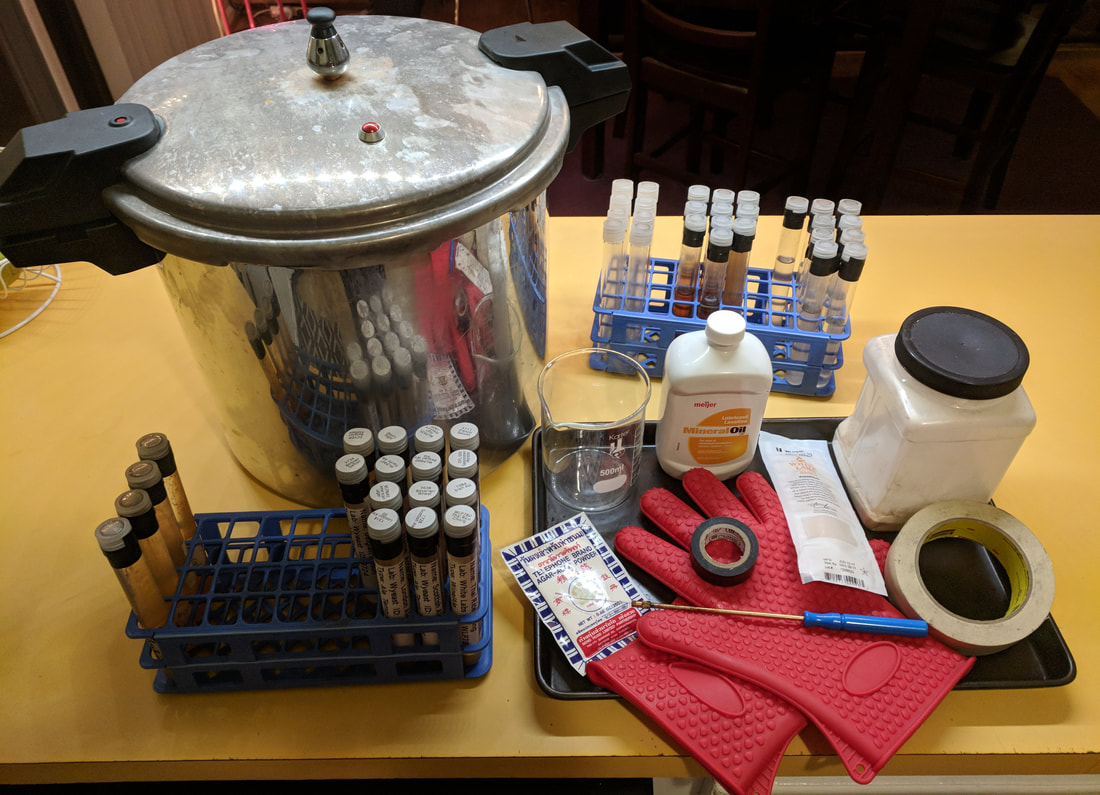 Everything you need to make yeast slants Slanting yeast doesn't require a lot of materials, and many of them are fairly common household items or can be obtained easily/cheaply.
Preparing SlantsWhen we prepare the yeast slants, we are going to prepare some mini starters and also sterilize some mineral oil. 1. Boil 1L* of water in your measuring cup/beaker. 2. While stirring, slowly pour 70g* DME into the beaker. Make sure it is all dissolved. 3. Pour this into your test tubes, filling them about half way. These will be your initial mini-starters. 4. Pour out enough wort so that you have 500ml* of wort left. 5. While stirring, slowly pour 8g* agar agar into the beaker. Make sure it is all dissolved. 6. Pour this into some other test tubes, filling them about half way. These will be your actual slants. 7. Fill some other test tubes half-way with mineral oil. You'll need one of these for each slant. 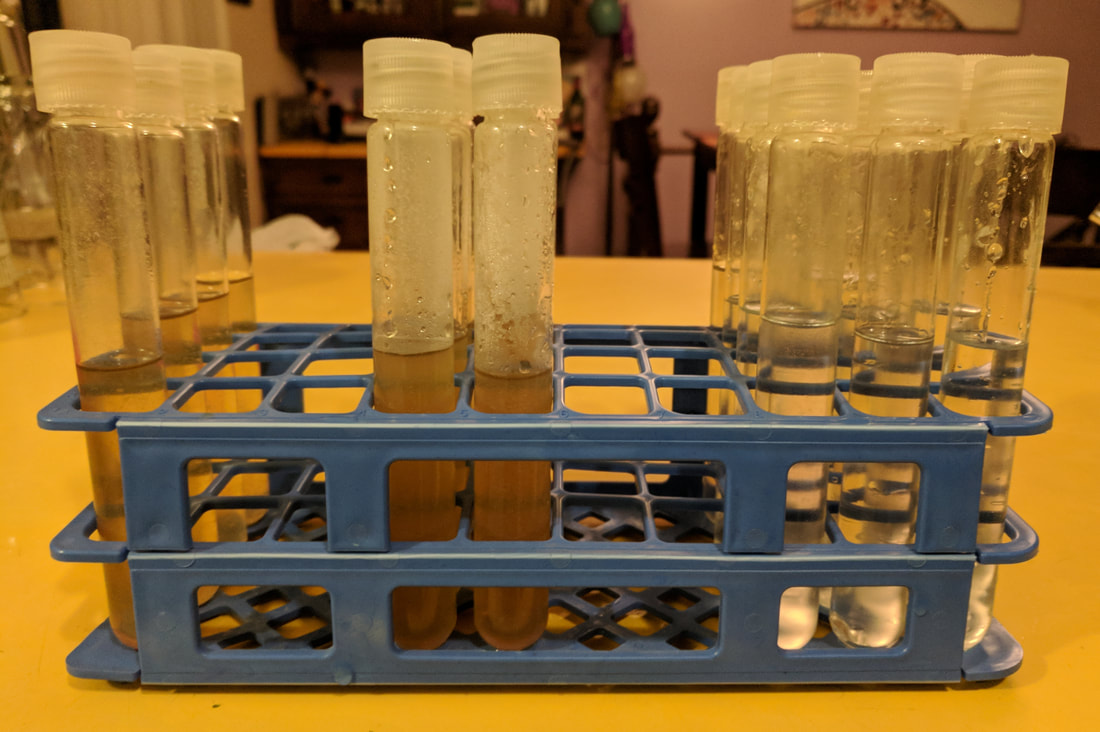 Test tubes ready for the pressure cooker. 8. Screw caps on all test tubes so they are somewhat loose. Air will need to escape from them while they are in the pressure cooker. 9. Put all test tubes in rack, into pressure cooker and put the lid on the pressure cooker. 10. Set pressure to 15PSI and begin cooking. Once pressure is reached, set timer for 20 minutes. 11. Once time is up, turn off heat and allow pressure to drop on its own as it cools. 12. Once the pressure has dropped, you can remove the tubes and screw the caps on tight. For the slants give them a good shake, and place them on the cookie sheet, propped up by a pen or something. You want the angle of the cookie sheet to be such that the growth medium covers as much surface area as possible. 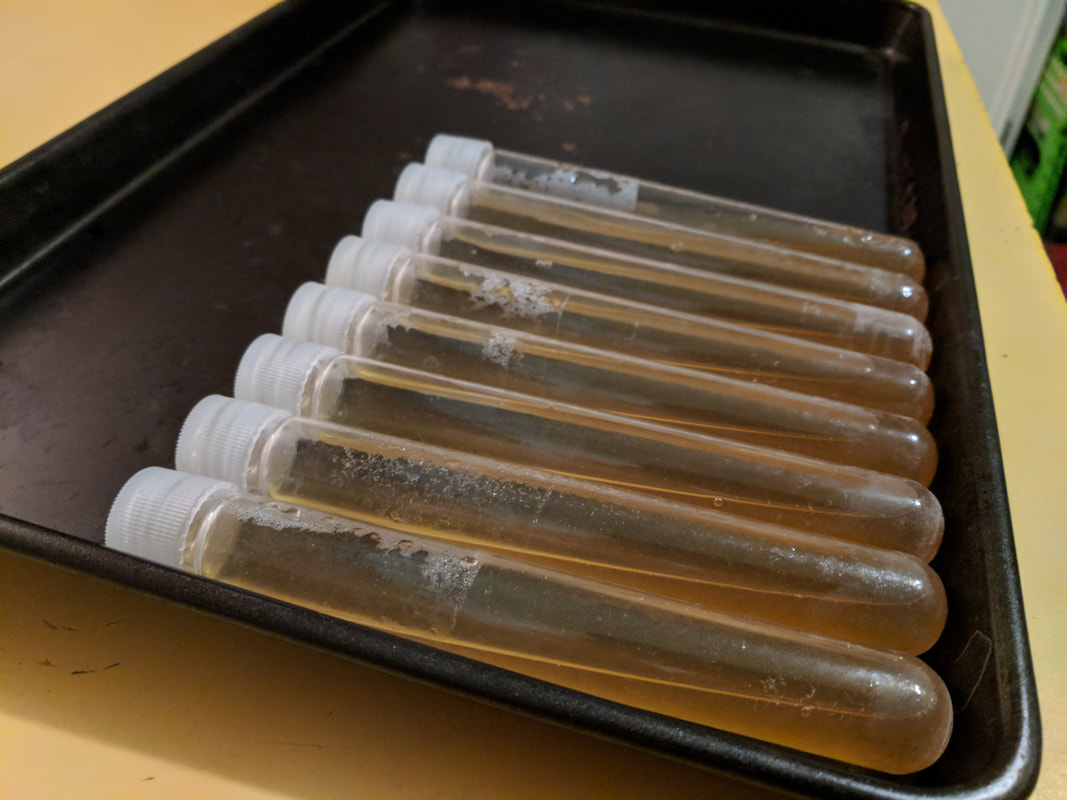 Slants angled well on the cookie sheet 13. Now you just need to allow them to cool and stiffen for a few hours. 14. Once cooled, wrap a piece of electrical tape tightly over the cap and tube of the slants, starters and mineral oil tubes, forming a nice tight seal. Allow the slants and mini starters to sit for at least two weeks prior to first using them (the longer the better), so you can be sure that they are not infected before use. Store the slants, starters and mineral oil at room temperature. There is no benefit to refrigerating them, and it could hide any potential infections. * You can make the starter wort/agar in whatever quantities or method you want. Just shoot for 1.020-1.030SG for the wort (7g DME per 100ml) and about 1.5g agar per 100ml. Innoculating Yeast SlantsNow that we've got our slants, lets bank some yeast! The procedure is very simple. It is best to use a fresh, unopened yeast package as your yeast source or a previous slant. This will ensure that your slant is consistent, with only the yeast you want inside. However, you can use a sample from a starter, a bottle of beer, trub, etc. too. Just realize that you run the risk of introducing other micro-organisms, which is especially critical when dealing with such tiny amounts of yeast. Do all of the below working over your flame source (gas stove on medium, alcohol lamp, etc.). The flame provides a sterile working environment, and will move air up and away from your work. 1. Sanitize the outside of your yeast package. 2. Remove the tape from your blank slant and loosen the cap. 3. Remove the cap from the slant, and flame the lip of the slant for a second to two to sterilize it. If there is some condensation in the slant, dump it out. 4. Put your innoculation loop in your flame source to sterilize it. Make sure to get the whole length of the loop that will be placed in the yeast package or test tube. 5. Take your innoculation loop and insert it into your yeast source. You need only a pin-prick's worth of yeast. You want the yeast to grow from this sample size, not consist of it. 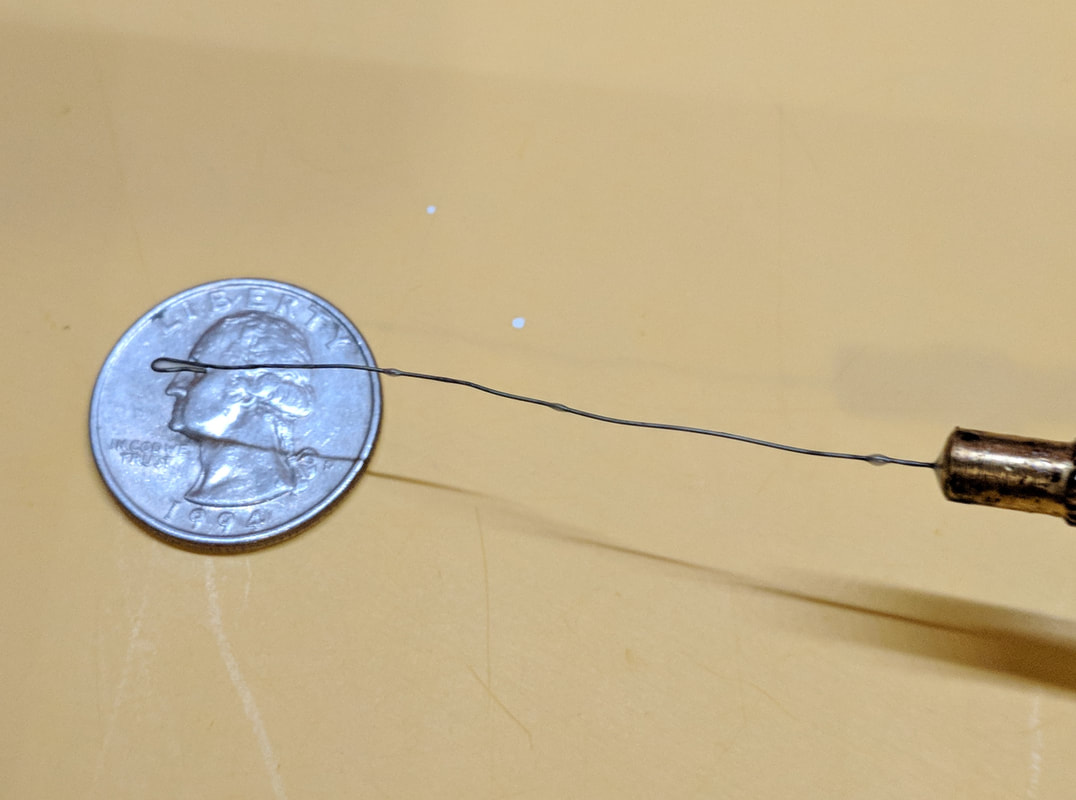 The amount of yeast needed to create a slant 6. Swipe the innoculation loop all over the surface area of the prepared slant. You want to cover as much of the surface as possible. 7. Repeat steps 4-6 once more. 8. Flame the lip of the slant and the cap for a second or two to sterilize them (don't melt your cap!), then recap it. You can finish the following steps outside the flame source. 9. Wrap the cap and tube tightly with electrical tape to provide a nice, tight seal around the cap. 10. Label your yeast slant with masking tape or labels. 11. Let the yeast work for 4-7 days at room temperature. It's good to burp it every day or so, to avoid CO2 buildup. You should now see a bunch of nice, healthy yeast colonies growing on the slant. The time is not super critical. I've left them for up to a month like this with seemingly no issues. 12. Once your yeast has finished growing, we need to add the mineral oil for long term storage. Do the following steps over your flame source. Take one of your sterilized mineral oil tubes and your yeast slant. Remove the tape from both and loosen the caps. 13. Remove the caps and flame the lips of each of the tubes. 14. Pour the mineral oil into the slant, leaving a couple mm, so you don't pour the mineral oil out when flaming the lips. 15. Flame the lip of the tube and the cap for a second or two to sterilize them (don't melt your cap!), then recap it tightly. 16. Remove from the flame source, and wrap the cap and tube tightly with electrical tape to provide a nice, tight seal around the cap. 17. Store in a refrigerator until ready to use. 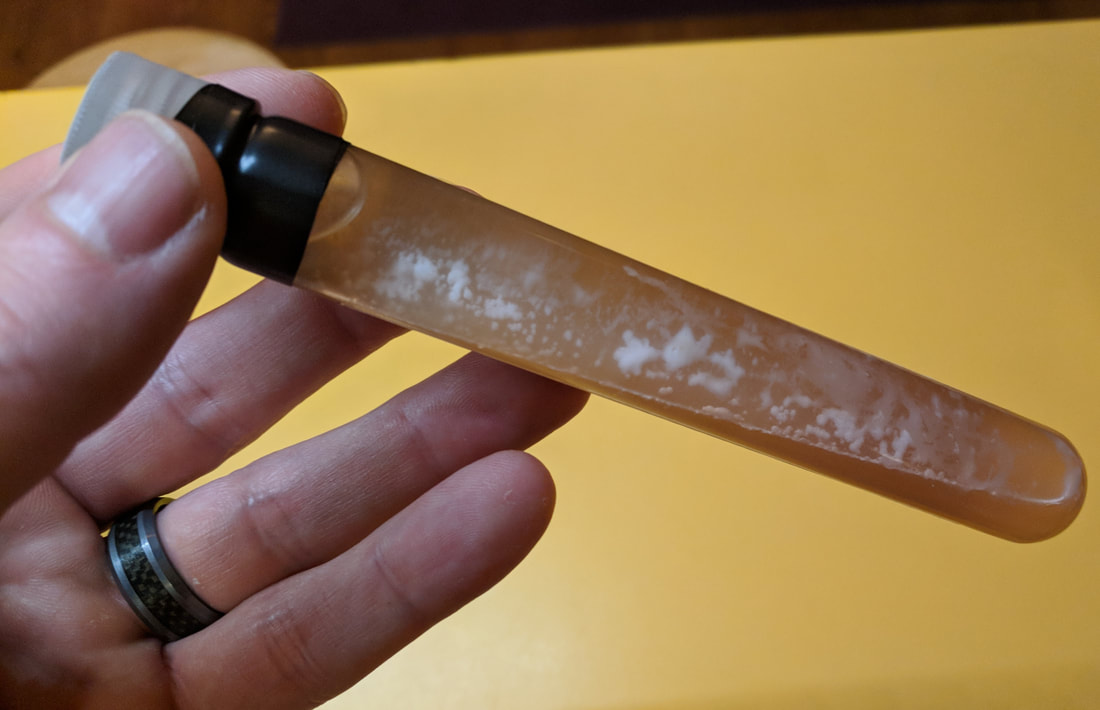 A finished slant Using a Yeast SlantNow that you've got your yeast bank started, let's use one of those yeasts for a beer. It's pretty simple. We'll need to work over our flame source (gas stove on medium, alcohol lamp, etc.) again here. 1. Remove the tape from your yeast slant and mini starter, and loosen the caps. 2. Remove the caps from the slants, and flame the lips for a second or two to sterilize. 4. Put your innoculation loop in your flame source to sterilize it. Make sure to get the whole length of the loop that will be placed in the tubes. 5. Take your innoculation loop and insert it into your yeast slant and pull a sample of yeast from a single colony. You need only a pin-prick's worth of yeast. 6. Dip your innoculation loop into your mini starter and swirl it around to try and remove all yeast from the loop. 7. Repeat steps 4-6 again. 8. Flame the lip of the slant and mini starter, and the caps for a second or two to sterilize them (don't melt your caps!), then recap. 9. Wrap the cap and tube of the slant tightly with electrical tape to provide a nice, tight seal around the cap. 10. Allow the yeast to propagate for 2-3 days. Burp it whenever you walk by it to be safe and avoid CO2 buildup. 11. After the yeast has grown for a few days, dump it into a standard 1.040 SG, prepared 100ml starter*. 12. Allow that starter to grow for another 2-3 days. From here, just grow it to whatever size needed for your beer. * I like to brew big batches of starters at once, then can them in various sizes of mason jars with my pressure cooker. This makes stepping up starters very simple as you can store them at room temp indefinitely. Reslanting Yeast/MaintenanceYour yeast should be fine to use, as long as it is still white. Once it starts turning brownish, or after 2 years, you should probably reslant it. All you have to do to reslant yeast is follow the instructions for Innoculating Yeast Slants, except use your old slant as the yeast source. Easy peasy! When I first started doing yeast slants, I actually stored my first yeast bank at room temp, as I seemed to have glossed over the fact that you are supposed to store them in a fridge. During that time, I had used them to make starters just fine, and over a year later, once I realized I was supposed to refrigerate them, I successfully reslanted all of them! This is a very stable method to store yeast.
*Note, I have also added this post to the Rivertown Homebrewers blog, of which I am a proud member.
26 Comments
Michael Graves
1/19/2019 07:01:19 pm
Thank you so much for this outstanding how-to-guide. I am really impressed with your attention to detail and easy-to-understand instructions. 1/26/2019 08:05:29 pm
Thanks! I'm glad you find it useful. I knew at one time the average cell count in a 10ml starter from a slant, but I can't seem to find it anymore. I stopped worrying about it a while ago, since the calculators would always tell me I needed ~2L starter every time, so I just make 2L starters for all my brews. Now, I do brew a little different than most people, and I build recipes based on grain weight, not volume, so every time the yeast count necessary is going to be pretty much the same. My mash tun holds ~15 lbs of grain, so I build recipes based on that, and use top-up water to hit my volume if it's more than my boil kettle. Of course, my mash tun and boil kettle are the same, because I use a Brewer's Edge Mash & Boil, but the sentiment stands.
Fabio Piras
2/17/2019 10:04:22 am
Thanks for the guide! I always wanted to start my own bank, partially to avoid my GF always asking what the hell I need all those yeast bottles in the fridge. I've never did it because it seemed quite complicated, but your guide showed me that it can be done with very little additional gear! 2/19/2019 03:48:19 pm
You're welcome. I'm glad you found it useful! Let me know if there's anything that needs clarification.
Fabio
8/13/2019 10:20:05 pm
I'm happy to say that my yeast bank is growing, it still fascinates me to see a mini Krausen in a test tube inoculated from a slant! I have a question regarding pitching rates: I mostly do 5L batches, so instead of doing a 2L starter I will do a 0.5L on a shaker plate in 1.040 wort. Is it reasonable to assume that I would get about the same pitch rate as I would with a 2L starter in a 20L batch? I couldn't find any information on wether the growth rate scales linearly with the starter volume. 8/16/2019 05:18:54 am
I'm not sure why I couldn't reply to your other comment, so I'm replying here. Yes, on our scale the growth rates for starters are linear. You can verify by using a yeast pitching calculator like mrmalty.com and giving it a sufficiently high batch size so you are dealing with many L starters. I tried with 1,000 and 100 gallon batches, and the starter for the 100 gallon batch was more or less 1/10th the size of the 1,000 gallon one.
Fabio Piras
8/16/2019 05:52:57 am
Thanks again! I checked with Bryan from Sui Generis Brewing, he says that it is not perfeclty linear but it doensn't really matter on this scale. In his video on how to make starters from slant he also says that there are 30-60 billion cells in a 300 ml starter, so I guess I'm pitching more than enough in a 5 L batch. 8/12/2019 05:09:31 am
I have not and don't know if it would have negative effects. Everyone can get their hands on mineral oil though. It's sold in every grocery store or pharmacy. It's used as a constipation aid and is very cheap. 9/9/2019 10:07:14 pm
This is very interesting. Very well described and put together. Can you tell me though, can dry yeast be activated and then cultured or does your method only work with liquid yeasts. Now I realize that while writing that it may sound stupid, but to be honest I’m not familiar with working with liquid yeasts and I’m not sure that by activating dry yeast that the result will be the same or not. Again thank you for the immense amount of information, but I would be interested in replicating Fermentis US-05 which I use a lot of. 9/10/2019 06:22:44 am
Thank you. I'm glad it is helpful for you. You certainly can use this method to slant dry yeasts. Just take your sample either from the rehydrated yeast, or a starter. I've done it a few times.
Peter
11/8/2019 01:04:34 am
Thanks for this information. My brewing style is based upon an adequate starter and it helps to have them ready in advance. 11/14/2019 05:45:42 pm
You don't put slanted yeast in the pressure cooker. The pressure cooker is just for creating the slants and mini starters.
Peter
11/14/2019 09:13:29 pm
Thanks John. Stupid question! Sorry to waste your time. I was actually referring to the canning of your mini starters. So one can can yeast safely using a cooker. I would never have thought that.
Alex
2/27/2020 02:16:08 pm
Great blog. I have two questions: 2/27/2020 02:38:33 pm
Correct, you just take what you need off the slant. Until you rebuild the slant, every 1-2 years, or use it up. You don't decant the mineral oil. I think what you are referring to from other blogs is frozen yeast banking with glycerin. That's a different technique, which requires freezer space, and a lot more room.
Alex
2/28/2020 12:26:29 pm
Thanks for the reply! 2/28/2020 04:22:53 pm
Not sure why, but it won't let me reply to your other comment. Anywho, yeah, I've never seen someone do it that way, but I'm not really a fan of what he's doing there. A layer of mineral oil or to a lesser extent distilled water helps protect the yeast. Doing it his way, that yeast is probably only good for a few months. Using the mineral oil, it's good for 1.5-2 years before you should reslant. The other problem with that method is it's actually way more labor intensive (since you'd need many more slants and need to reslant all the time) and space consuming. You'd need a tube for every pitch that way, whereas I only need a tube for every strain. I have 40+ strains of yeast on hand and it takes up less space than a 12 pack. The downside to my method is that it takes slightly longer to propogate. I usually try to plan my yeast a week ahead of a brew. However, if my fermentation chamber is free, so I can keep the stir plate at 80-85*, I can propogate from slant to pitch in 3 days. I plan on building a little heated yeast propogation station when I have time with a heated seedling mat, an Inkbird temp controller and a clear Rubbermaid container.
Alex
3/2/2020 08:45:25 am
Completely agree. I'll be using mineral oil and picking individual colonies seems far less wasteful, and also minimises the possibility of getting any contaminants on the slant into the starter.
Adam Campbell
4/21/2020 09:11:22 am
Dude, thanks so much for the tutorial on how to do this. I've been thinking about getting in to slanting for some time, but didn't really find any useful information until your blog. I'll be bookmarking, and using this soon. Thanks again!
Alex
5/9/2020 10:08:35 am
I've successfully slanted and brewed from 4 different strains of yeasts so far following your blog - thanks! 5/9/2020 11:05:25 am
I'm glad you found it useful!
Erik Simoes
5/24/2020 04:53:45 am
Thank you so much! 5/24/2020 06:45:16 am
I'm glad you find it useful. Good luck in your yeast slanting adventure!
Paul
5/2/2023 04:42:27 am
Could you sterilise (disinfect) using a bleach solution? Just trying to think whether I’ll need to buy another kitchen gadget (of which I have too many!)
Brian
8/4/2023 01:24:28 pm
What is the OG of your slants? I have seen some sources suggest 1.005 (which is what I do) and others say 1.050. Leave a Reply. |
Archives
December 2017
Categories |
 RSS Feed
